Computers/Latitude E5540: Difference between revisions
Appearance
m fix port list formatting |
Add images |
||
| Line 4: | Line 4: | ||
They were purchased from ComputerCorps in Carson City on 14 September 2023 for $1250: nominally 10 for $125 each, with an extra laptop with a missing battery thrown in free of charge. | They were purchased from ComputerCorps in Carson City on 14 September 2023 for $1250: nominally 10 for $125 each, with an extra laptop with a missing battery thrown in free of charge. | ||
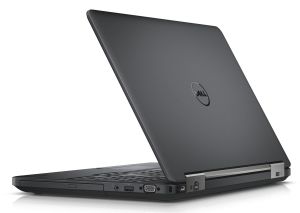
[[File:Latitude E5540 Right.jpg.jpg|thumb]] | |||
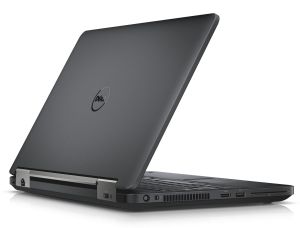
[[File:Latitude E5540 Left.jpg.jpg|thumb]] | |||
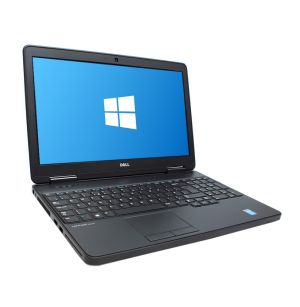
[[File:Latitude E5540 Front.jpg.jpg|thumb]] | |||
{| class="wikitable" | {| class="wikitable" | ||
|+ | |+ | ||
Revision as of 17:56, 14 September 2023
We own a set of 11 Dell Latitude E5540 laptops.
They were purchased from ComputerCorps in Carson City on 14 September 2023 for $1250: nominally 10 for $125 each, with an extra laptop with a missing battery thrown in free of charge.


| Manufacturer | Dell |
|---|---|
| Model | Latitude E5540 |
| Manufactured | 8 December 2014 |
| RAM | 4 GB DDR3L 1600
1x 4 GB SODIMM, 1 slot open |
| CPU | Intel Core i3-4030U 1.9 GHz 2 cores |
| Graphics | Intel HD Graphics 4600 |
| Storage | 64 GB SSD |
| Optical | DVD+/-RW |
| Ports |
HDMI (up to 3200x2000@60Hz)
|
| Display | 15.6", 1366x768, touch |
| Size | 14.92 x 9.86 x 1.32 in |
| Weight | 6.13 lbs |
Firmware
While the Dell logo screen is displayed during boot:
- Press F2 to enter the setup utility
- Press F12 for a one-time boot menu
Firmware Update
We should periodically check the Dell support site for new BIOS updates. We're currently using version A24 from 4 December 2019.
To update the BIOS without Windows:
- Format a USB flash drive with a FAT32 file system
- Download the Windows EXE for the BIOS update from Dell and put it on the flashdrive
- Reboot the laptop, and on the Dell logo splash screen, press F12 to get to the boot menu
- Select "BIOS Flash Update" from the boot menu
- Click the "..." button to the right of "BIOS update file" and choose the EXE file
- Click "Begin Flash Update"
Firmware Setup
These settings are recorded for BIOS version A24. Press F2 at the boot logo screen to enter setup.
- Press the "Load Defaults" button
- General
- Boot Sequence
- Set "Boot List Option" to "UEFI"
- Use the "Delete Boot Option" button to remove any options other than the primary OS
- Press the "Apply" button
- Advanced Boot Options: uncheck "Enable Legacy Option ROMs"
- Boot Sequence
- System Configuration
- Integrated NIC: set radio group to "Enabled"
- Parallel Port: set radio group to "Disabled"
- Serial Port: set radio group to "Disabled"
- SATA Operation: set radio group to "AHCI"
- Miscellaneous Devices
- Uncheck "Enable ExpressCard"
- Uncheck "Enable Hard Drive Free Fall Protection"
- Power Management
- Primary Battery Charge Configuration: set radio group to "Primarily AC Use"
- POST Behavior
- Fastboot: set radio group to "Minimal"