Laminating Machines/Apache
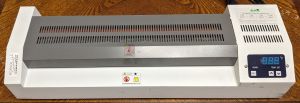
We have two large-format laminating machines from Apache: an 18" capacity AL18P and and a 13" capacity AL13P.
The AL13P has been out of commission since 2019 with a cracked quartz heating element tube. We bought the AL18P in 2021 to replace it.
Disassembly & Repair
This procedure is written based on the AL18P but should be nearly identical for the AL13P.
For disassembly you pretty much only need a #2 Phillips screwdriver. For cleaning you'll also need isopropyl alcohol, paper towels, and optionally a soft brush like a toothbrush and some kind of scraping tool.
Warning
When it's plugged in, the inside of the machine contains exposed mains voltage. Do not plug in the machine with its white top cover removed unless you have been trained how to safely service mains-powered equipment.
The entire central roller assembly gets very hot in operation. Ensure that the machine has fully cooled before attempting disassembly.
Remove the Top Cover
Remove the gray cover over the rollers. It just lifts up and off.
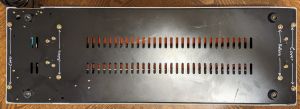
Turn the machine over and remove the outermost four screws on the bottom (labelled "Cover" here). Don't remove any other screws - you don't need to and things will come loose inside, which will make it harder to reassemble later.
Carefully turn the machine back over - the white top cover is no longer attached to the black base, so you'll have to hold them together while you flip it.
Remove the screws on either side of the display. It will fall inwards. For reassembly you'll need to lift the white cover slightly and hold the display up from the inside to reinstall the screws.
Lift off the white top cover and set it aside. You may have to tilt it backwards slightly to clear the back rollers. If there are badges stuck through the slot in the cover and into the rollers it may take quite a bit of force to pull the cover off past them; just make sure that you're only applying force to the stuck badges and not to the rollers.
Removing the Rollers
The rollers are held in place and tensioned by four spring-loaded clamps, one at each corner of the roller assembly.
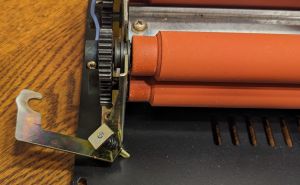
Hang one end of the machine at a time over the edge of the table so you can reach the roller clamp screws on the bottom of the machine without turning it over. Loosen the clamp screws until the rectangular nuts are right at the end of the screws as shown here.
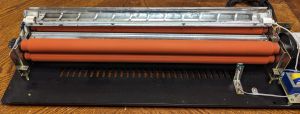
Remove the small screw at each end of the upper heating element shield (the long silvery galvanized metal object between the rollers above) and lift the upper heating element in its shield up and out of the way.
One at a time, pull each of the four roller clamps up as far as it will go and then slide it along its long axis away from the roller assembly. It should stay attached to the base plate; if you remove the nut from the screw it's more annoying to reassemble.
Once all four clamps have been removed, you can lift the rollers straight up and out of their channels. This will reveal the bottom heating element behind the bottom front roller.


